Do you think sometimes that you can accidentally erase phone contacts by mistake? Or, that your phone can be stolen and all your valuable information including phone numbers, memos, personal data could be gone away? I assume, you will agree that buying a new phone is not a big deal, but most painful is when you loose phone contacts you have been collecting over the past years. Most people see repercussions when it’s already too late.
Therefore, read carefully this how-to guide and learn how to avoid this problem in a timely fashion by backing up phone contacts to your Gmail account.
This guide consists of 4 parts:
1. The first part is about backing up the contacts to the phone’s internal storage or SD card;
2. The Second part is about preparations in the Gmail’s Contact Manager;
3. In the third part we will import backed up contacts to Gmail account through the phone;
4. The last part is about the unified management of the contacts.
Back up phone contacts
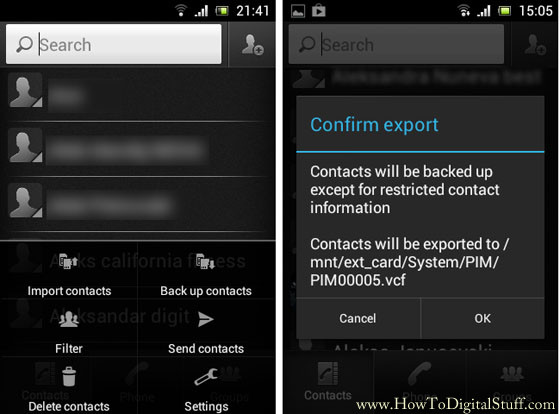
Using the contact manager on your phone do a backup by exporting all contacts to either the phone’s internal storage or to the SD card. The purpose of this is having the last state of the phone directory before syncing with Gmail. Maybe it’s even better to the SD card because you can later transfer the backup easily to your laptop using the card reader. Bluetooth is nice option as well.
Preparations in Gmail’s Contact Manager
By default, when you create a new contact in Gmail, it is saved in the primary group “My Contacts”. If you want to avoid mixing your phone contacts with existing contacts in Gmail then it is recommended to move all existing Gmail contacts from default group “My Contacts” to another one.
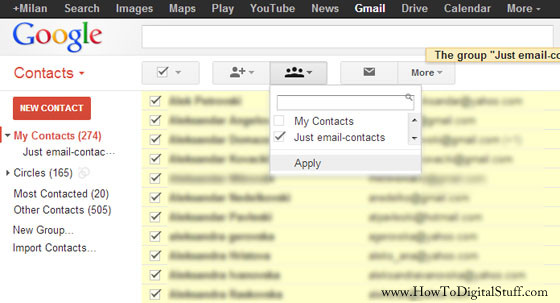
For that purpose go to My Contacts in Gmail, select all and then click Groups button. Choose a different group if it exists or create a new group. Make sure you uncheck the checkbox beside My Contacts, so only newly created group is checked. Repeat previous steps until you move all contacts to the new group. ‘My Contacts’ category needs to be empty because we want only our phone contacts to be here. Click Apply.
This way, you will move all contacts from default group to the newly created group (in my case from “My Contacts” to “Just email-contacts” group). The point of doing this is to avoid mixing the contacts that will be synchronized between the phone and Gmail.
If you want both of them in a single place just skip this step.
Configuring Gmail account and Enabling Sync
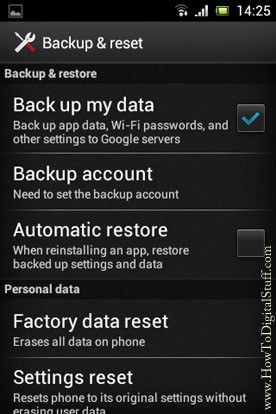
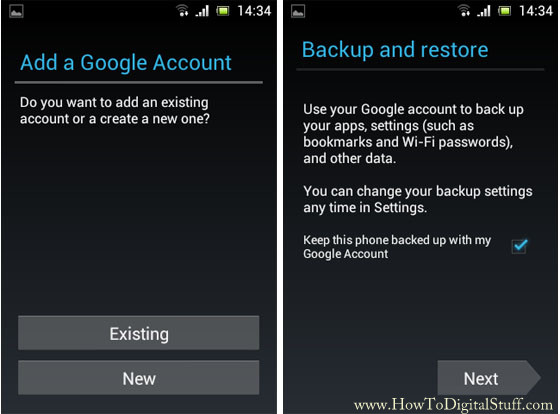
First we need to enable the Data Backup option in the phone. Go to phone settings and navigate to Backup & Reset. Enable “Back up my data” option:
Then tap the “Backup account” option. Here we will need to set a backup account. Press ‘add account’ and add details about your existing Gmail account or create a new one:
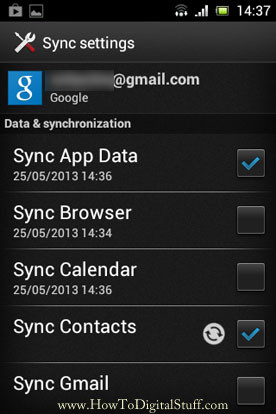
Once we have setup the backup account, we need to go to Accounts & Sync menu to configure details (by default all items are checked). Make sure the Sync Contacts option is checked:
Import contacts into the Gmail account through the phone
If you did the previous steps correctly, now it is time to import previously backed up contacts from the SD card to the Gmail account configured on your phone.
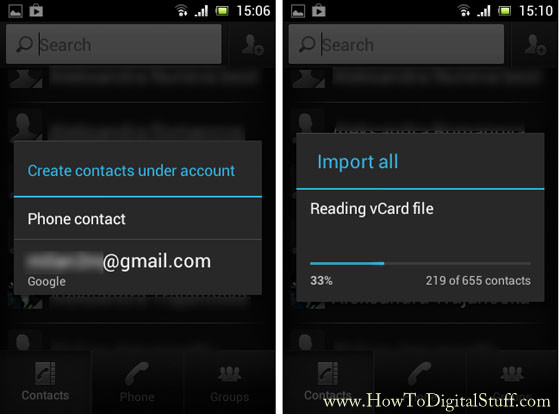
The point of this is following: since we enabled Gmail account on the phone, we will import all contacts by pushing them in the phone and from the other side since the phone is with enabled synchronization it will sync them to the Gmail (choose the option to Create contacts under Gmail account):
Soon after the import process starts, you will notice phone Contacts pumping up in the Gmail’s default group “My Contacts“. This process will take a couple of minutes, depending on the number of contacts.
Manage contacts from wherever you want
In the phone directory change the settings about which contacts will be displayed – instead of ‘phone contact’ choose ‘Google contact’.
With this type of configuration you can manage contacts from wherever you want, either through your Android phone or through Gmail’s web interface. The best thing is your contacts will be always up to date.
Notice: The screenshots used in this guide are taken from Android 4.0 (Ice Cream Sandwich).

