Before delivering a presentation, it is recommended to disseminate prints to the audience, so they can eventually take notes for each slide while they follow the presentation.
In this guide you will read how to configure settings in the Handout Master (which is part of the Microsoft PowerPoint product) and the two options regards to creating handouts.
Configure settings in the Handout Master
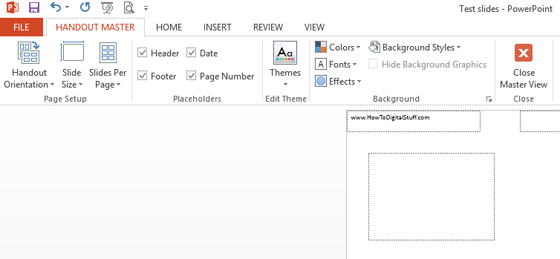
Before proceeding with explaining the options, let’s take a look at Handouts Master – it is a place where you configure all options regards the handouts such as: handout orientation, slide size, slides per page, header, footer, page numbers, themes and other things.
In the PowerPoint go to View and then click Handout Master. Adjust the options as necessary.
Option 1: First option is to export slides as editable handouts in Word
Follow these steps:
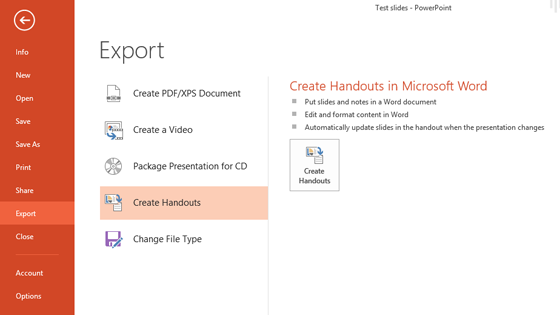
First go to the File menu -> Export -> Create Handouts. Click “Create Handouts”.
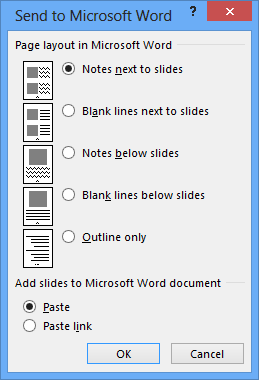
Then, you have several options to choose for the Page layout:
– Notes next to slides
– Blank lines next to slides
– Notes below slides
– Blank lines below slides
– Outline only.
Choose the option that works best for you.
If you want the Word document to be updated each time you make changes to the PowerPoint slides, choose “Paste link” option before clicking the OK button.
Option 2: Second option is to export PowerPoint slides by publishing them as PDF document
If you don’t plan to edit handouts in Word, then maybe the easiest way is to create handouts by publishing the slides as a PDF document.
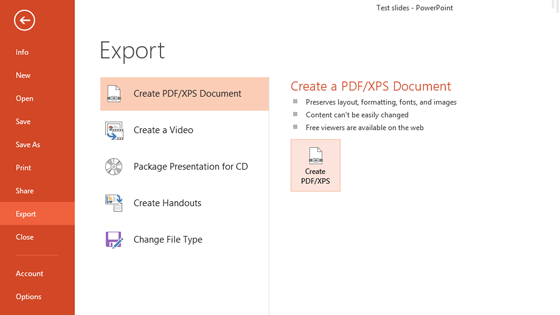
Go to the File menu -> Export -> Create PDF/XPS Document. Click “Create PDF/XPS”:
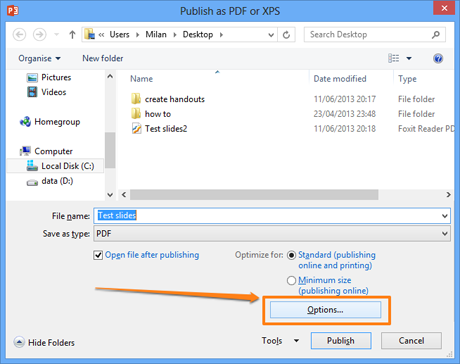
On the pop up window, click Options:
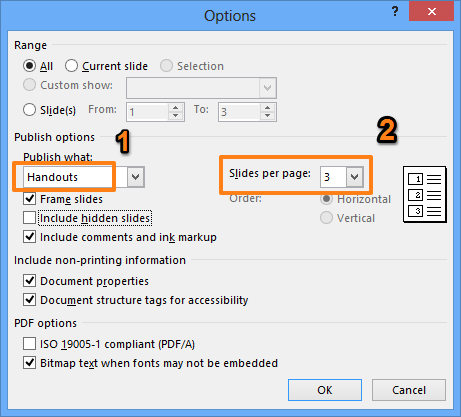
Make sure you choose to publish “Handouts” (this is under Publish Options) and choose how many slides per page you want to see:
Click OK and you’ll see the layout within your default PDF reader. You may either print this file or distribute it through email.


