If you have at least once installed Windows 8 Pro or Windows 7 Pro, during the installation process you probably noticed that there was no question about Administrator account neither setting the password. Setup manager only requires only one custom username that will automatically become a member of local Administrators group.
But, over the course of time, most probably you will need to use the Administrator account for certain management operations.
The question is: Where to find it? It does not show up on the welcome screen nor in C:\Users.
Starting from Windows Vista and on – Microsoft established a practice to leave the Administrator account disabled, by default (this also applies to Windows 7 Pro and now Windows 8 Pro).
Here are easy yet simple instructions how to enable it:
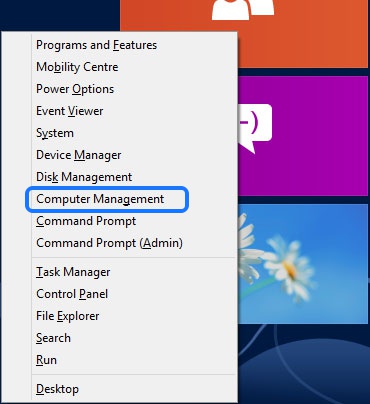
Step 1: First we need to open Computer Management console. There are several options how to do this, but in this guide we will use keyboard shortcut. Press WinLogo+X on your keyboard and from the pop-up menu choose Computer Management:
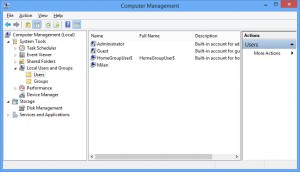
After that, following window should appear (click to zoom in):
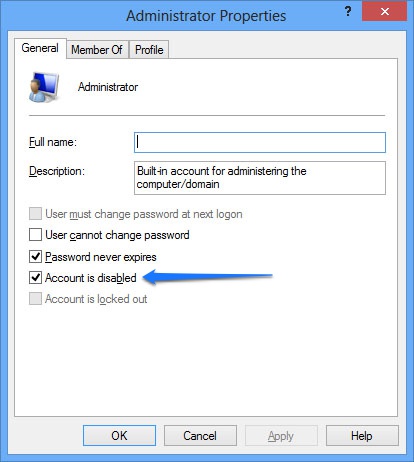
Step 2: Navigate to System Tools > Local Users and Groups > Users. Double click on Administrator account and on the next pop-up window, clear (uncheck) option “Account is disabled”.
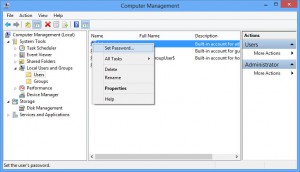
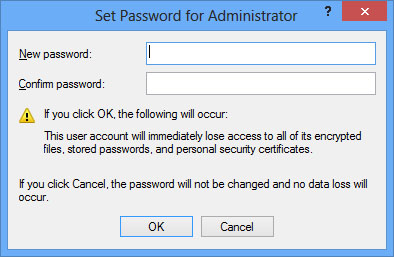
Step 3: Last step is to initialize Administrator account, which means to set a password. Right click the Administrator account and choose the first option “Set Password…”.
On the next Window disregard the warning and click Proceed button. Choose a strong password and type it in both fields. You should see a confirmation message that the password has been set.
You are now ready to perform advanced administrative tasks on your Windows 8.
Related: How to change Administrator name without reformatting the computer (the guide is written for Win 7 but it can be applied also for Win 8)


